
If you've already priced out a modular kitchen, the wardrobe conversation can feel like deja vu, except most first time buyers underestimate it going in. A full height wardrobe across one wall of a standard Indian bedroom is usually the second largest carpentry cost in your entire interior budget, right behind the kitchen, and it's where quotes tend to move the most between the first meeting and the final invoice. This piece walks through how wardrobe pricing actually works, what you're really paying for inside the box, and where costs quietly get added after you've already signed.
How Wardrobe Pricing Actually Works
Wardrobes are priced on elevation area, not volume. Multiply the width of the wardrobe by its height and you get the square footage a designer will quote against. A fairly standard bedroom wardrobe, say 10 feet wide and 7.5 feet tall, comes to 75 square feet of elevation. That number, multiplied by a per square foot rate, is where your base wardrobe cost comes from.
The base rate typically includes the carcass (the box structure), the shutters, basic hinges and channels, and one or two internal shelves plus a hanging rod. It typically does not include the loft above the wardrobe, internal accessories beyond a basic shelf, a mirror panel, or any lighting inside the unit. Those get quoted as separate line items, and this is exactly where budgets creep if you're not asking for an itemized breakdown from day one.
Scope check
Per square foot wardrobe rates almost always cover the main wardrobe elevation only. Loft, internal accessories, and mirror units are usually priced separately - ask your designer to show all of them as individual line items before you sign anything.
Three Wardrobe Layouts for Indian Bedrooms
Most Indian bedrooms end up choosing between three layouts, and the right one depends more on room dimensions than personal taste.
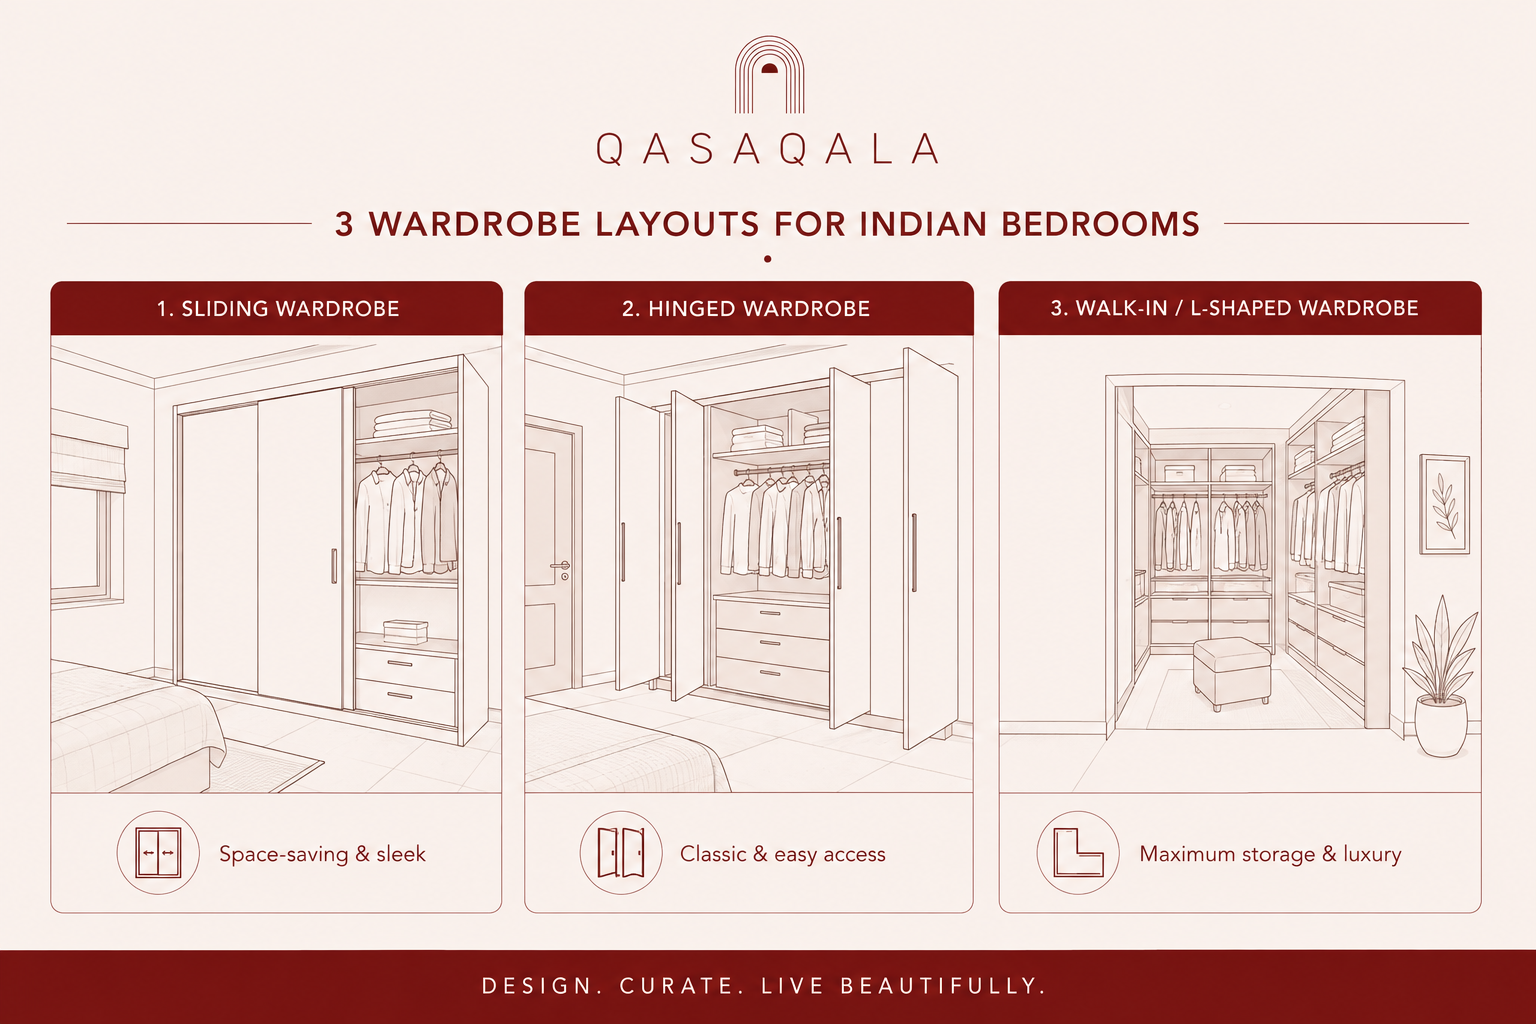
Sliding shutters (2 or 3 panel): the space efficient choice, since there's no door swing to plan around. Works well in bedrooms under 11 feet wide or wherever a bed, study table, or door swing already competes for floor space. Costs more per square foot than hinged doors because of the track and roller hardware.
Hinged, openable shutters: the traditional and generally cheaper mechanism, but each shutter needs roughly 2 to 2.5 feet of clearance to swing open fully. Works best in larger bedrooms where furniture placement isn't tight.
Walk-in or L-shaped combo: built for bigger bedrooms with a dedicated dressing area. Usually integrates the wardrobe, a loft, drawer units, and sometimes a dressing table into one continuous run. Highest total cost of the three, but the best organization per square foot of storage.
The Material Question: What's Actually Inside the Carcass
The shutter finish is what you see. The carcass material is what determines whether your wardrobe is still holding its screws and hinges properly in five years, and it's the part most buyers spend the least time asking about.
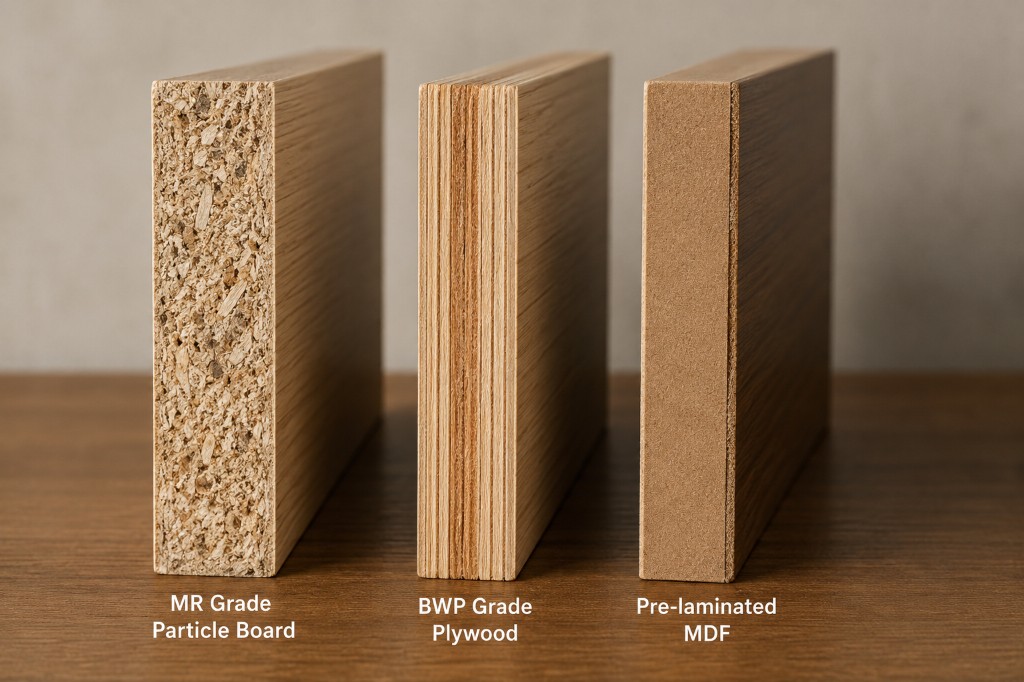
MR grade particle board (moisture resistant) is the entry point material, common in budget builds. It holds up fine in dry, well-ventilated bedrooms but isn't ideal near an attached bathroom wall or in coastal, high-humidity cities.
BWP grade plywood (boiling water proof) is structurally stronger and handles moisture significantly better, which matters more than people expect in Indian bedrooms that share a wall with a bathroom or sit on a lower floor with dampness issues. It sits in the mid to premium tier and is the material worth asking about by name.
Pre-laminated MDF shows up in some budget builds as a middle option, denser than particle board but still more moisture sensitive than BWP ply. Fine for dry climate cities, worth avoiding if your bedroom is anywhere near a wet area.
Shutter Finishes and Where They Land on the Tier Scale
Once the carcass is settled, the shutter finish is what sets your visual tier and a good chunk of your final bill.
- Laminate: the budget to mid workhorse. Wide color and texture range, durable surface, though a seam is sometimes visible at the shutter edge depending on the laminate thickness used.
- PVC membrane foil: budget tier, gives a seamless look with no visible edge line, but has lower heat resistance, worth avoiding directly above or facing a window with strong afternoon sun.
- Veneer: mid to premium, a real wood look and feel, but needs periodic polishing to keep its finish over the years.
- PU or lacquer finish: the premium option, available in high gloss or matte, the most scratch resistant of the four, and the most expensive per square foot.
Before you finalize a finish
Ask to see a full size door sample in your actual room's lighting, not a 2 inch catalogue swatch. Laminate and veneer both read differently under LED spotlighting than they do under a showroom's diffused light.
Here's how a 75 square foot wardrobe (the 10 ft by 7.5 ft example above) breaks down across the three tiers, using 2026 tier 1 metro rates:
| Tier | Rate per sq ft | Carcass | Shutter finish | Approx. total (75 sq ft) |
|---|---|---|---|---|
| Budget | Rs 1,100 to 1,500 | MR grade particle board | Laminate | Rs 82,500 to 1,12,500 |
| Mid | Rs 1,700 to 2,400 | BWP grade plywood | Laminate or veneer | Rs 1,27,500 to 1,80,000 |
| Premium | Rs 2,600 to 4,000+ | BWP plywood, reinforced | Veneer or PU/lacquer | Rs 1,95,000 to 3,00,000+ |
These figures cover the main wardrobe elevation only, excluding loft, internal accessories, and mirror units, which are detailed in the sections below. Tier 2 city rates typically run 10 to 20% lower than the tier 1 estimates shown here.
Loft Storage: The Line Item Everyone Underestimates
The loft, that shallow storage space above the main wardrobe usually reserved for suitcases, out of season bedding, or things you touch twice a year, gets left out of a lot of first quotes. Not by accident. Dropping it keeps the headline number lower and easier to say yes to in that first meeting.
Loft storage that gets added after the main wardrobe is already installed does not cost the same as loft planned into the original order. You aren't paying for extra material at that point, you're paying a carpenter to remobilize for a single cabinet, and that remobilization charge alone can run 20 to 25 percent higher than the same square footage would have cost the first time around.
The fix is simple: even if you're not sure you want the loft, ask for it to be quoted and itemized upfront. You can always decide not to build it. What you want to avoid is discovering the "just add it later" option costs meaningfully more than deciding on day one.
Internal Accessories: What's Worth the Upgrade
Internal accessories are where the same budget, mid, premium tier logic from the shutter finish section applies again, this time to what's actually organizing your clothes.
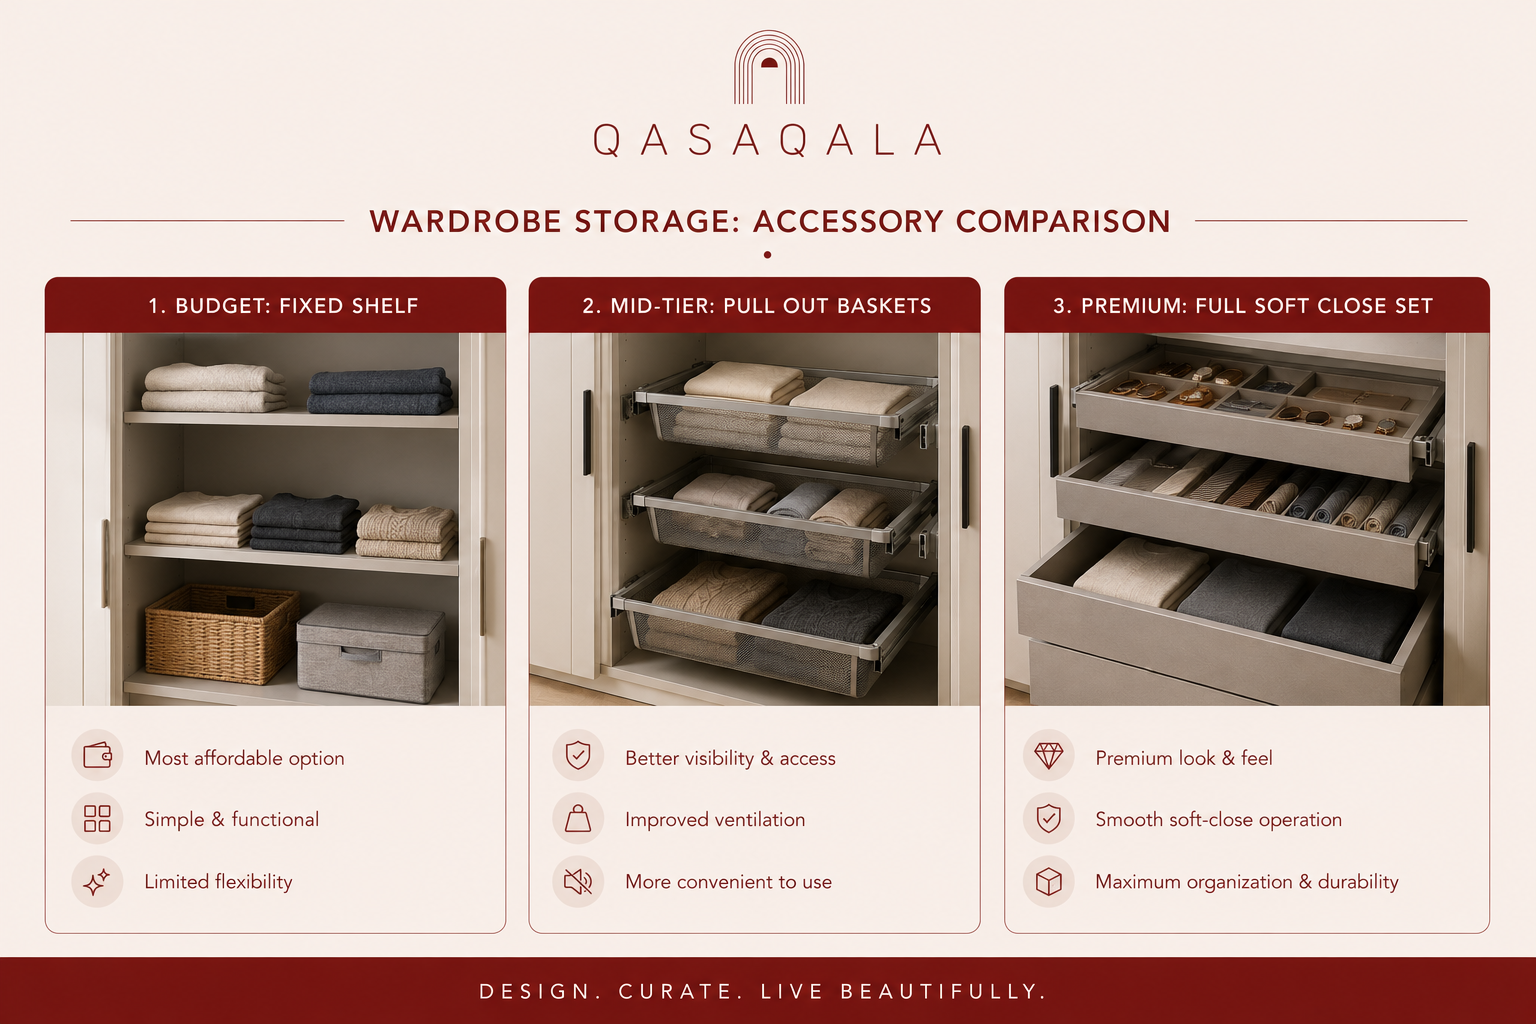
- Budget tier: fixed shelves and a single hanging rod. Functional, no moving parts to maintain.
- Mid tier: two to three pull out wire or laminate baskets, a drawer with a basic divider, a separate saree or dupatta rod.
- Premium tier: a full soft close accessory set, dedicated jewelry tray with velvet lining, tie and belt rack, integrated shoe rack module, and sometimes a pull down hanging rod for higher sections that are otherwise hard to reach.
None of these are essential to a functioning wardrobe. They're the difference between a wardrobe you open and dig through, and one where everything has an assigned place. Worth deciding tier by tier rather than accepting whatever the default quote includes.
Sliding vs Hinged: Choosing the Right Mechanism
This decision comes back up because it affects both your cost and your daily experience of the wardrobe, so it's worth revisiting with the numbers in hand.
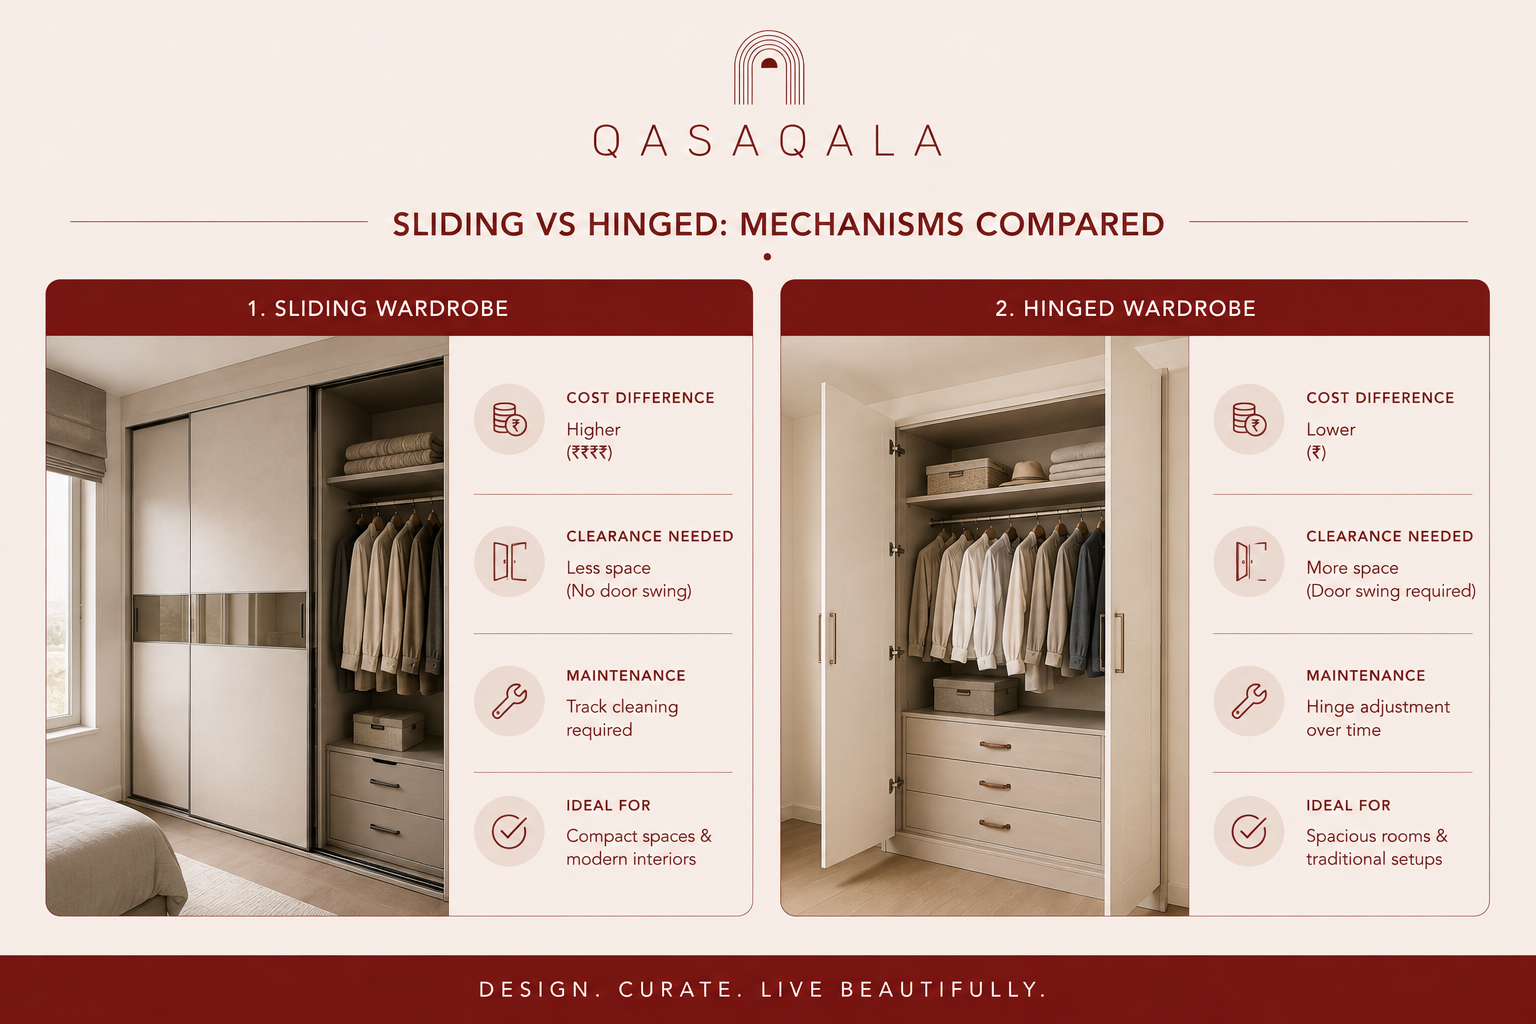
Sliding mechanisms typically cost 15 to 25% more than hinged shutters of the same elevation area, driven by the track, rollers, and soft close sliding hardware. In exchange, you get zero door swing clearance needed, which matters in a lot of Indian bedrooms where a bed or study table already sits close to the wardrobe wall. The tradeoff is maintenance - tracks need occasional cleaning and realignment to keep sliding smoothly over the years.
Hinged shutters are simpler mechanically, generally cheaper, and have fewer moving parts to maintain. They need real floor clearance to open fully though, so they work best in bedrooms with 10 feet or more of usable width in front of the wardrobe.
Red Flags to Check Before You Sign
- Carcass material grade not specified in writing. MR and BWP grade plywood behave very differently over time - get the grade named, not just "quality plywood."
- Loft cost missing entirely, or bundled vaguely into a single "wardrobe total" with no separate line.
- No hardware brand named for hinges, channels, or soft close mechanisms. Generic or unnamed hardware is one of the first things to fail.
- Edge banding type not mentioned. Thin or poor quality edge banding is usually the first visible thing to peel or lift.
- No warranty period stated for hardware, separate from the warranty on the carpentry itself.
- Site measurements taken only once, with no second check scheduled before the wardrobe goes into production.
The Bottom Line
A wardrobe quote is really three decisions stacked on top of each other: the carcass material that determines how long it lasts, the shutter finish that determines how it looks, and the loft and accessories that determine how well it actually organizes your things day to day. Ask for each of those three priced and itemized separately, and you'll know exactly what you're paying for and why, which is really the only way to compare one quote against another honestly.
See it in your actual room
Upload your floor plan and see any flooring type rendered in your own space - before ordering a single tile.
Try QasaQala free